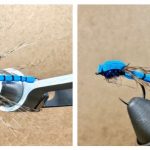
Damsel in Distress

Terrestrial
Tied By Joe Glessner
Hook: Daiichi 1130 #12 or equivalent (preferably black finish)
Thread: Semperfli 8/0 Classic Waxed Thread, Black
Body Parts: abdomen, hackle, wing case, tail
Materials: Hareline Ripple Ice Dub – Northern Lights (RDB262), or any blue dubbing, Coq de Leon saddle feather (or any hackle with barbs slightly shorter than your tail), 2mm Blue foam (cut ~4mm wide), 2mm Blue foam (cut ~2mm wide)
Notes:
I developed this pattern after watching an absolute tank of a Rainbow take a damsel right in front of where I had been fishing for the better part of an hour without a bite.
Instructions:
- For the tail: cut a piece of 2mm craft foam to be 2mm wide by about an inch and a half long.
- Use a lighter to seal one end of the tail, being careful not to burn or distort this thin piece of foam. This is optional but I like the way it looks.
- Cut the body partially in half lengthwise, being careful to keep the cut as close to the middle of the foam as possible, and leaving about 2mm of one end (the sealed end, see additional pictures) connected. Do not use serrated scissors for this.
- For the wing case/parachute post): cut a second piece of 2mm craft foam to be about 4mm wide by about an inch and a half long (I used the hook gap of a #12 Daiichi 1130 to measure the width).
- Place a thin needle in your vise to build the extended body on. Mount the partially cut body piece with the needle point embedded into the uncut end, with the cut pieces to either side of the needle.
- Leaving a long tail on your thread (3 inches plus), work your thread between one side of the foam body and the needle, tying a band around a small section at the sealed end to create the first body segment. I use 4-5 wraps of thread for each segment.
- Carefully work the thread back between one side of the body and the needle, being careful not to cross over any of the foam diagonally when doing so. Wrap the thread around just the needle under the foam twice to advance your thread the where you want the next segment to begin. Each segment should be slightly larger than the previous segment.
- Repeat this process until you have the desired number of segments (I like six) with enough foam remaining for one additional segment on the hook.
- At this point place a 3 turn whip finish carefully over the thread used to create your last segment, and snip your bobbin free, leaving about as much extra thread as your tail.
- Using your finger to support the length of the tail, carefully work the tail free of the needle.
- You can pull the thread tails gently to place tension on both ends of the thread, but do not pull too hard as you will distort the tail. Unlike a dragonfly, the damselfly tail should remain as straight as you can get it.
- Mount your hook in the vise and tie on your thread creating an index point about one bodkin width behind the hook eye. It’s easy to crowd the hook eye on this one so the index point is important.
- Wrap the thread back to the hook point with touching turns.
- Carefully attach your tail, creating the final segment by placing the two halves of the body on either side of the hook shank, tying in the extra thread along the top of the hook as well. A couple of loose wraps can be used to get the positioning of the tail right before firmly binding it down. Remember to make this segment slightly larger than the previous segment.
- Snip off the excess foam and thread tails with an angled cut. Wrap tightly over the butt ends to secure them.
- Tie in the other piece of foam on top of the hook, butting right up against the tail. This will be the post for the hackle and also the wing case.
- Strip a small section of the butt end of the hackle to create a tie in point and mount it on top of the hook with the barbs oriented horizontally as you would for any parachute post.
- Wrap the hackle around the post 4-5 times, taking care to travel up the post as little as possible, while keeping the fibers perpendicular to the hook.
- Carefully sweep back the hackle to the rear of the post so you can tie off the feather where you started it without trapping any of the hackle fibers. Make sure the hackle is secure and return your thread to the base of the post.
- I like to keep the abdomen thin, so if using Ice Dub, I create a dubbing loop here. If using another dubbing or you want it buggy, dub the abdomen forward to the index point as you like and skip the next step.
- If using a dubbing loop, create the loop and wrap your thread forward to the index point. Finger dub the ice dub as tightly as possible to one side of the dubbing loop. Spin the dubbing loop closed as usual to tighten up the ice dub before wrapping it forward to the index point. This creates a surprisingly tightly dubbed abdomen with ice dub.
- Tie off the dubbing and snip free the excess.
- Gently fold the post forward to create a wing case, carefully parting the hackle to either side. I try to split the hackle evenly and sweep it slightly to the rear, using the post to position it to my liking.
- Tie off the post at the index point to create a wing case.
- lift the excess foam and create a small thread head behind the hook eye. This will lift the foam off of the hook eye making the fly much easier to attach to your tippet.
- Keeping the excess foam lifted, whip finish behind the small thread head you just created, and snip free your thread.
- Trim the excess foam at a rearward angle, leaving a small tag to keep the foam from slipping out.
- If any of your hackle fibers were trapped pointing down, snip them off or pluck them out with tweezers.
This will be fished as a spent damsel, so it’s ok if the hackle isn’t perfect, or the body isn’t arrow straight.
This fly may take a little longer to tie than most damsel patterns, but I find that it is also more durable than others I have tried.
https://flyvault.net/wp-content/uploads/formidable/13/IMG_0411-150×150.jpeg, https://flyvault.net/wp-content/uploads/formidable/13/IMG_0412-150×150.jpeg, https://flyvault.net/wp-content/uploads/formidable/13/IMG_0413-150×150.jpeg, https://flyvault.net/wp-content/uploads/formidable/13/IMG_0414-150×150.jpeg, https://flyvault.net/wp-content/uploads/formidable/13/IMG_0415-150×150.jpeg, https://flyvault.net/wp-content/uploads/formidable/13/IMG_0416-150×150.jpeg, https://flyvault.net/wp-content/uploads/formidable/13/IMG_0417-150×150.jpeg, https://flyvault.net/wp-content/uploads/formidable/13/IMG_0420-150×150.jpeg, https://flyvault.net/wp-content/uploads/formidable/13/IMG_0422-150×150.jpeg, https://flyvault.net/wp-content/uploads/formidable/13/IMG_0423-150×150.jpeg, https://flyvault.net/wp-content/uploads/formidable/13/IMG_0424-150×150.jpeg, https://flyvault.net/wp-content/uploads/formidable/13/IMG_0425-150×150.jpeg, https://flyvault.net/wp-content/uploads/formidable/13/IMG_0427-150×150.jpeg, https://flyvault.net/wp-content/uploads/formidable/13/IMG_0429-150×150.jpeg, https://flyvault.net/wp-content/uploads/formidable/13/IMG_0432-150×150.jpeg, https://flyvault.net/wp-content/uploads/formidable/13/IMG_0433-150×150.jpeg, https://flyvault.net/wp-content/uploads/formidable/13/IMG_0434-2-150×150.jpeg, https://flyvault.net/wp-content/uploads/formidable/13/IMG_0435-150×150.jpeg
